|
|||||||||||||||||||
|
|||||||||||||||||||
|
Communication Overview and Tutorial
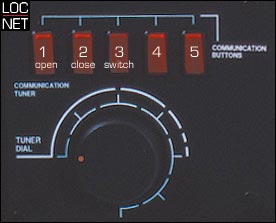
Communication is absolutely vital to be successful on the battlefield. Steel Battalion: Line of Contact has an adequate, if slightly convoluted communication interface that should be learned as quickly as possible, to the point where its control becomes second nature. 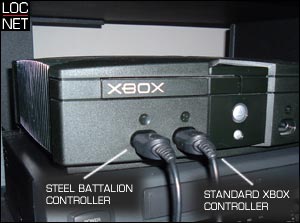 Setup To start, the hardware must be plugged in properly. Although the Steel Battalion controller will work on any port, I always recommend that it goes on Port 1 of the XBox console so it is prioritised on the I/O bus. A standard XBox controller is alos required, and should be plugged into Port 2 of the XBox console. These port designations are suggestions, the game will work with the controller plugged into any port. If your situation demands, you may use a controller cable extension with the standard controller. I am uncertain as to whether the Steel Battalion controller should be used with an extension. The XBox Live headset and interface are plugged into the standard XBox controller. I'll say it once here: There are no Steel Battalion controllers which have a headset port on them. This design was planned, but ultimately never went into production. 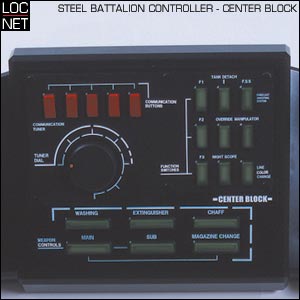 All communication functions are controlled via the Tuner Dial and Communication Buttons on the Center Block of the Controller. Opening and Closing Communications
At the start of a Mission, team pilots are assigned to channels based on the Sortie Room slot they have. The pilot at the "top" of the Sortie Room positions for their team is assigned to Channel 1, the second position pilot to Channel 2, and so on for all pilots on the team. 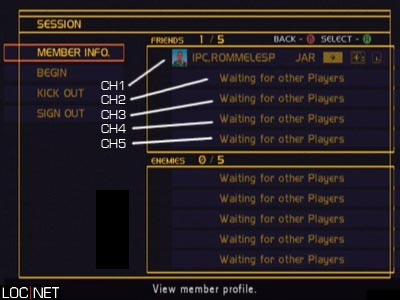 These channels correspond to Tuner Dial positions on the controller, starting at the "9 o'clock" position for Channel 1, with each stop clockwise being another channel. See the image below. 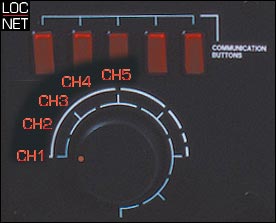
 Channel Identification Tips
When a communication channel is open, it can be confusing to new pilots to determine who they are speaking with. Below are some helpful cues that will aid in understanding the communication features. 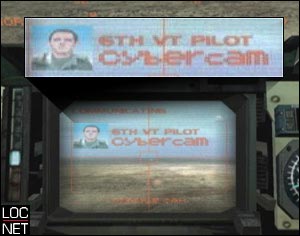 When a communication channel is active, the pilot name, number and avatar as displayed as an overlay image on the SUB-MONITOR view as above. If the screen is too small to see easily, press the F3 function button on the center block to "lean in" to the SUB-MONITOR for a better look at the screen. 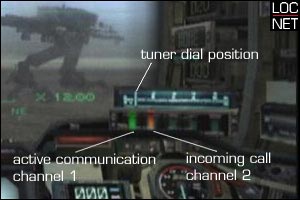 The cockpit display for communications is located to the right side of the viewscreen. The position and style vary depending on the generation and combat class of VT currently piloted. The example above is from a first generation, standard combat VT. Pilots are advised to become familiar with the various cockpit types. 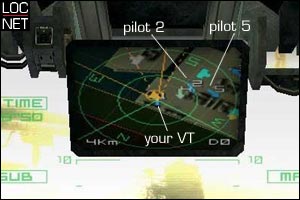 Finally, each player is represented on the MULTI-MONITOR map view with a directional arrow and a number, which just happens to correspond to their current communication channel. When communications are active with another pilot on the team, the respective arrow will "pulse." On the main viewscreen, each team pilot is also indicated by a small square/number overlay, which will also pulse when communications are active. If the screen is too small to see easily, press the F2 function button on the center block to "lean in" to the MULTI-MONITOR for a better look at the screen. Final Notes
A final few words of advice regarding communications. If an attempt to open communication is made and only a short "beep" is received, it means that there is no available party to receive the request. Typically this means that either the Tuner Dial is in the incorrect position, or the player that had occupied that slot is no longer in the session (having been dropped, killed in action, or ran out of VTs). |
|||||||||||||||||||
